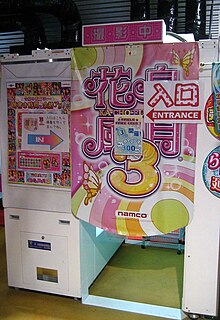
today i wanna share something maybe some of you guys are interested well actually my friend ask me to post this thing, it's PURIKURA here a simple definition of purikura i've got from wiki-chan *yeah i know i'm lazy :p*
Purikura
In Japan, purikura (プリクラ) refers to a photo sticker booth or the product of such a photo booth. The name is a shortened form of the registered trademark Purinto Kurabu (プリント倶楽部). The term derives from the English print club. Jointly developed by Atlus and Sega, the first purikuramachines were sold in July 1995.
credit : wikipedia
so, there's some booth in my country but the booth is so different than Japan's purikura booth, i don't know if my country has a booth like this or not, but yeah..not everyone have time to go to the booth just to take a funny picture ne?? :D
so this is a little tutorial for you who want to make a purikura with potoshop, FYI i'm NOT a professional in it i still a beginner, maybe there's some mistake on it, well i just want to share this ok :D let's start.
for this tutorial i'm using Adobe Photoshop CS3 portable *you can use CS2 or CS4 also*. but first make sure you have some additional "brush" and "style" in it, if not, then you can download it HERE at Hanako-lovely, really thanks to her :D
download it, unzip then *i forgot the type of the file, it's between zip and rar* , open your photoshop.
- click, BRUSH icon, then see in the up right corner of the box there's some tiny line and an arrow, click it
- you'll see some option, choose "LOAD BRUSH"
- then you can choose every brush from the file that you unzip before,choose one of them and click *LOAD* the brush will automatically store on your brush panel.
if you've done installing all the brush set *you can find so many brushes at hanako's blog* then we can start making purikura. here the step by step tutorial i hope that you can understand what i'm saying *due to my lack of English hehe :D*
1. choose your picture : FILE >>> OPEN >>> choose picture >>>> click OPEN
2. adjust the pictif you want to adjust the pict to be brighter, then you can try this one
IMAGE >>> ADJUSTMENTS >>> LEVEL
then you can see this window choose "LIGHTER" or "DARKER" to lighten or darken your picture
3. to fix the brightness then you can try this
IMAGE >>> ADJUSTMENTS >>> CURVES
adjust the curve until you get a right lighting on the picture you can shove the curve up or down, right and left just try to find a right brightness level.

5. select "LAYER 1" by clicking it. then click the PAINT BUCKET TOOL or you can press G on your keyboard
6. Paint the layer by clicking on the picture like below picture
7. adjust the capacity of "LAYER1" by clicking the capacity icon, and adjust the panel to around 50% so you can see the background clearly but still covered by the layer.
8. back to the background by clicking it. make sure that you can see every line on the background clearly so it will be easier to crop.
9. click the MAGNETIC LASSO TOOLS
10.start selecting from the bottom left of the background, move the cursor trough the line of the picture until you meet the first line *back to the first dot of selection* i know that it might be hardest part of editing *at least for me* but don't worry you can use MAGIC WAND to make it a little bit smoother :D
11. choose the MAGIC WAND to correct the selection, choose + to add and - to deselect part of the pict
this is the result after using MAGIC WAND tolols
13. use ERASER tools to make the selection smoother so the background color won't be look too "separate" from the picture
14. after finish correcting the picture then let's change the background. STILL WORKING ON LAYER 1
click STYLES icon and choose one of the style by clicking it *LOL for the intoxication XD*
15. after changing the background, then we can add some "PURIKURA" brushes on to the picture. first choose LAYER option, and make another NEW LAYER, just like before.
16. click BRUSH option and find a brush you want, for me, i choose Lolipop brush, you can adjust the size of the brush by shoving the panel on the bottom right of the brush option, click ON THE PICT to place the brush.

17. just like when we're changing the background, go to STYLES menu and choose the color

18. you can also adjust the image of the brush by clicking MOVE tools

then, adjust the position of the icon. click the MOVE TOOLS again, then they'll ask you if you want to apply it or not just like below, choose APPLY. then the position will be fixed.

19. do the same steps from 15 to 18 for other brush, make sure you ADD NEW LAYER before put a different BRUSH or color. you can do the same on TEXT.
and this is the result of our work...TADAAAAHHHH ~~~~
to save it click FILE >>> SAVE AS *choose JPEG* >>> SAVE
when you see a window like this just click OK, and your picture already SAVED.
current mood : bouncing
current music : GET OUT - JYJ


